
Setup LAN communication #
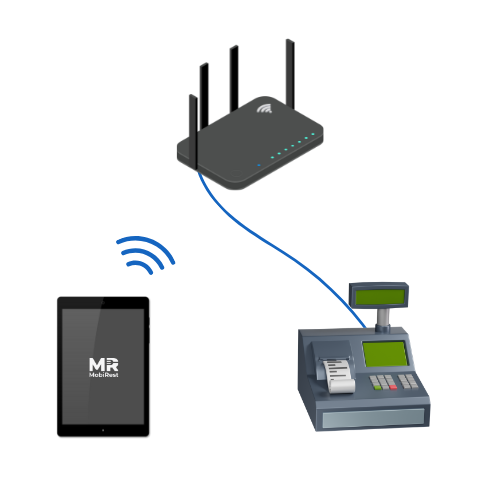
Make sure that the Datecs cash register has internet access and it’s on the same network as the MobiRest Connect Application. It is also important that both devices are on the same subnetwork—for example, if the MobiRest app is running on a device with IP address 192.168.1.x, then the Datecs cash register should have an IP like 192.168.1.y, assuming a subnet mask of 255.255.255.0. This ensures both devices can communicate properly over the local network.
Important: These instructions provide a general guide. The exact menu names, button presses, and options may vary slightly depending on your specific cash register model. Consult your cash register’s user manual for the most accurate information.
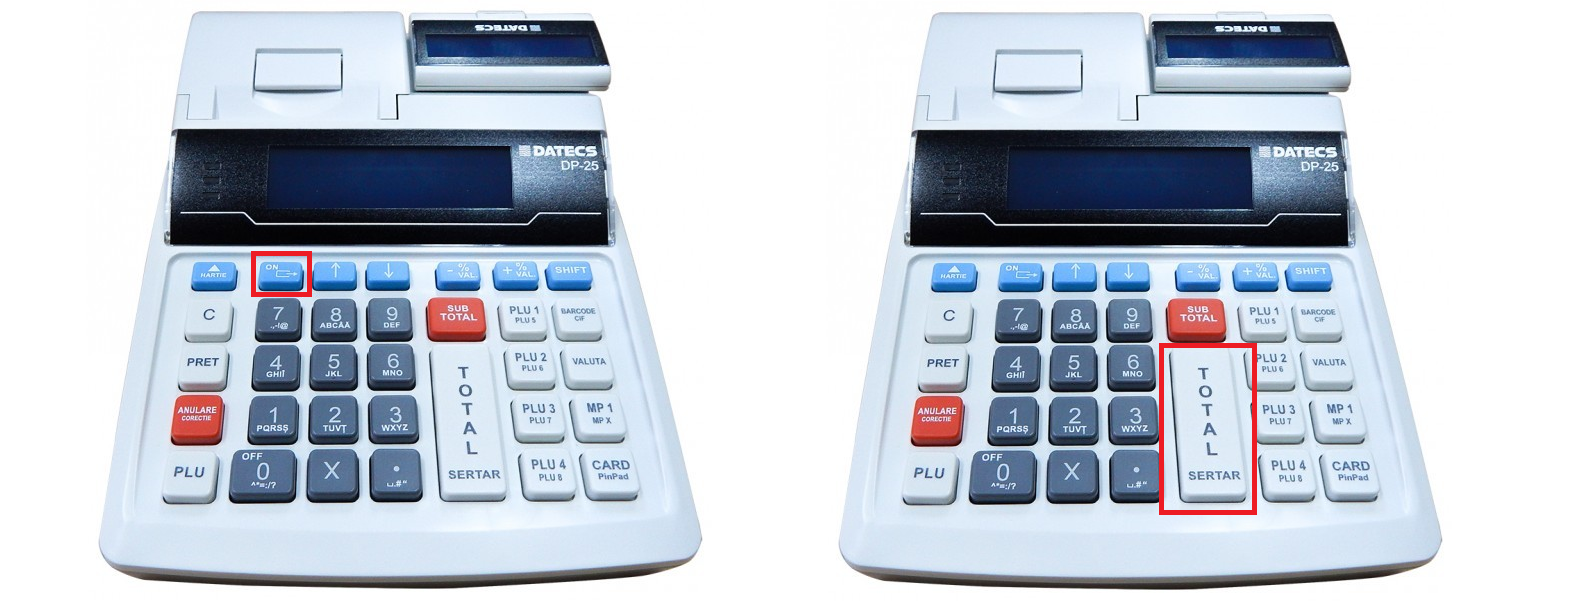
The “ON” and “TOTAL” buttons are the most critical and frequently used. (Illustrated below.)
- Accessing the Programming Menu:
- Ensure you are at the main menu. Repeatedly press the “ON” button (or the designated menu button, if different) until you see the main menu screen (“MENIU”).
- Select the “PROGRAMARE” (Programming) option. This is typically the 4th option, but refer to your screen. Press the “TOTAL” button (or the equivalent “ENTER” or “OK” button on your machine) to confirm your selection.
- You will be prompted for a password. The default password is often “0030,” but this may have been changed. Contact the owner or manager for the correct password if “0030” does not work.
- Press “TOTAL” (or equivalent) again to enter the “PROGRAMARE” menu.
- Configuring LAN Communication:
- Navigate to the “CONFIGURARE” (Configuration) menu. This is often the 13th item in the “PROGRAMARE” menu, but use your screen to locate it. Press “TOTAL” (or equivalent) to enter.
- Within the “CONFIGURARE” menu, find and select “COMUNICATIE” (Communication). This is often the 5th item. Press “TOTAL” (or equivalent).
- Select “LAN” (or “REȚEA LOCALĂ”). This is often the 4th item. Press “TOTAL” (or equivalent).
- Enable LAN: Check if “LAN” is enabled. Look for a “DA” (Yes) or “ENABLED” indicator. If it is not enabled, press “TOTAL” (or equivalent). A dialog box should appear. Select the option for “DA” (Yes) or “ENABLED” (often by pressing “0” or the corresponding number key).
- You will return to the “COMUNICATIE” menu.
- Setting the PC Connection Type:
- In the “COMUNICATIE” menu, select “CONEXIUNE PC” (PC Connection) or a similar option like “Tip Conexiune PC” (PC Connection Type). This is often the 2nd item.
- Choose “LAN” as the communication type. You might need to press “5” (or the corresponding number key) for LAN, followed by “TOTAL” (or equivalent). The screen should now indicate “LAN” as the selected connection method.
- Verifying the LAN Connection:
- Press “TOTAL” (or equivalent) and then the designated print key (often “0” or a specific button) to print a test bill.
- Crucially, check the printed bill. It should clearly indicate that the LAN connection is active. If you do not see confirmation of the LAN connection on the printout, repeat steps 2 and 3.
- Establishing the Connection:
- Press the “ON” button (or designated menu button) to return to the main menu.
- Select the “CONEXIUNE PC” (PC Connection) option. This final step is essential to activate the connection. Your cash register should now be ready for LAN communication. The display may show a confirmation message or change to indicate the connection status.
Additional information is available in the video below.
Reports and tax categories #
Print report X to see the tax categories configured on the device. In order to do that you have to do the following:
- Accessing the X Report Menu:
- Ensure you are at the main menu. Repeatedly press the “ON” button (or the designated menu button, if different) until you see the main menu screen (“MENIU”).
- Select the “RAPOARTE X” (X Reports) option. This is typically the 2nd option, but refer to your screen. Press the “TOTAL” button (or the equivalent “ENTER” or “OK” button on your machine) to confirm your selection.
- Entering the Password:
- You will be prompted for a password. The default password is often “0030,” but this may have been changed. Contact the owner or manager for the correct password if “0030” does not work.
- Press “TOTAL” (or equivalent) again to enter the “RAPOARTE X” menu.
- Printing the Detailed X Report:
- Select the “X DETALIAT” (Detailed X) report option. This is often the 1st option, but use your screen to locate it. Press “TOTAL” (or equivalent) to print the report.
- Reviewing Tax Categories:
- The X report will be printed. This report will list the tax categories currently configured on your cash register. Carefully review the printed report to see the defined tax categories and their associated rates.
- Returning to PC Connection (If Applicable):
- Important: If you were setting up a PC connection via LAN (as described in the previous setup instructions), you must return to the “CONEXIUNE PC” (PC Connection) menu after printing the X report. This is usually done by returning to the main menu and then selecting “CONEXIUNE PC”. This final step ensures that the cash register is ready for communication. Refer to steps 15 and 16 of the previous setup instructions for details. If you were not setting up a PC connection, this step is not necessary.
Additional information is available in the video below.
Troubleshooting #
- If you encounter any issues, double-check all connections (if relevant).
- Refer to your cash register’s user manual for detailed troubleshooting information.
- Contact your cash register vendor or IT support for assistance.