
LAN/WiFi Network Setup #
Make sure that the Datecs fiscal printer has internet access and is connected via LAN or WiFi to the same network as the MobiRest Connect application. It is also important that both devices are on the same subnet — for example, if the MobiRest application is running on a device with the IP address 192.168.1.x, then the Datecs fiscal printer should have an IP address in the form of 192.168.1.y, assuming a subnet mask of 255.255.255.0. This ensures proper communication between the two devices over the local network.


Important: These instructions provide a general guide. The exact names of menus, button presses, and options may vary slightly depending on the specific model of your printer. Please refer to your printer’s user manual for the most accurate information.
LAN configuration for FP-950MX #
To configure the printer to communicate via a LAN network (Ethernet interface), follow the steps below:
- Press the “BACK” button to return to the main menu.
- Using the arrow buttons, navigate to Menu No. 13 – TIPUL DE INTERFATA.
- Press the “FEED ENTER” button to access the interface settings.
- In the “TIPUL DE INTERFATA” menu, select the “ETHERNET” option using the arrow buttons.
- Press “FEED ENTER” again to confirm your selection.
- Depending on the current state of the printer, one of the following may occur:
- Scenario 1: If you are taken directly back to the previous menu, it means the LAN interface was already configured. You can exit the menu until the message “FP-950 IS READY” appears — the printer is ready for use.
- Scenario 2: If a confirmation screen appears (with “ETHERNET” on the left and “NU” on the right):
- Press the “FWD” button to change “NU” to “DA”.
- Press “FEED ENTER” to confirm the change.
- The printer will automatically restart with the new settings applied.
- After restarting, when the message “FP-950 IS READY” appears, the printer is configured and ready for use over the LAN network.
WiFi configuration for FP-950MX #
To configure the printer to communicate via a WiFi network (WiFi interface), follow the steps below:
- Press the “BACK” button to return to the main menu.
- Using the arrow buttons, navigate to Menu No. 13 – TIPUL DE INTERFATA.
- Press the “FEED ENTER” button to access the interface settings.
- In the “TIPUL DE INTERFATA” menu, select the “WIFI” option using the arrow buttons.
- Press “FEED ENTER” again to confirm your selection.
- Depending on the current state of the printer, one of the following may occur:
- Scenario 1: If you are taken directly back to the previous menu, it means the WiFi interface was already configured. You can exit the menu until the message “FP-950 IS READY” appears — the printer is ready for use.
- Scenario 2: If a confirmation screen appears (with “WIFI“ on the left and “NU” on the right):
- Press the “FWD” button to change “NU” to “DA”.
- Press “FEED ENTER” to confirm the change.
- The printer will automatically restart with the new settings applied.
- After restarting, when the message “FP-950 IS READY” appears, the printer is configured and ready for use over the WiFi network.
Accessing the Printer’s IP Address #
- Press the “BACK” button
- This step will take you to the printer’s main menu.
- Navigate using the arrow buttons
- Scroll through the menu until you reach Menu No. 11 – TEST LAN/WIFI.
- Press the “FEED ENTER” button
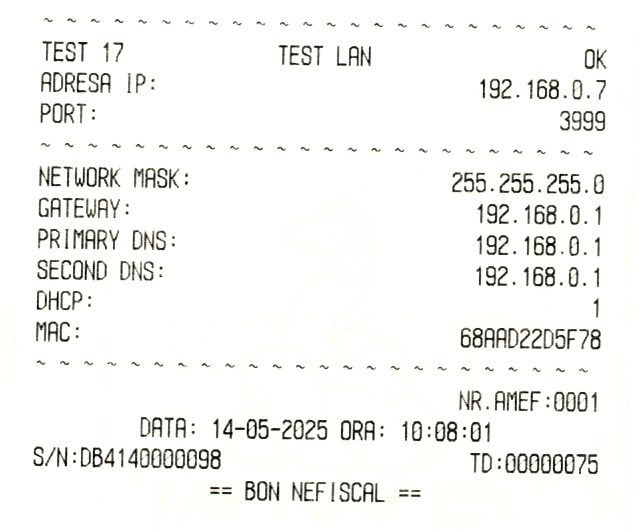
- The printer will print a page with connection information, which includes:
- IP Address
- Port
- Other useful connection details.
- The printer will print a page with connection information, which includes:
Troubleshooting #
- If you encounter any issues, double-check all connections (if relevant).
- Refer to your fiscal printer’s user manual for detailed troubleshooting information.
- Contact your fiscal printer vendor or IT support for assistance.